Have you ever looked at images that appear to be of very small objects and wondered how that image is created? For exmaple, this biro ball point pen taken below:
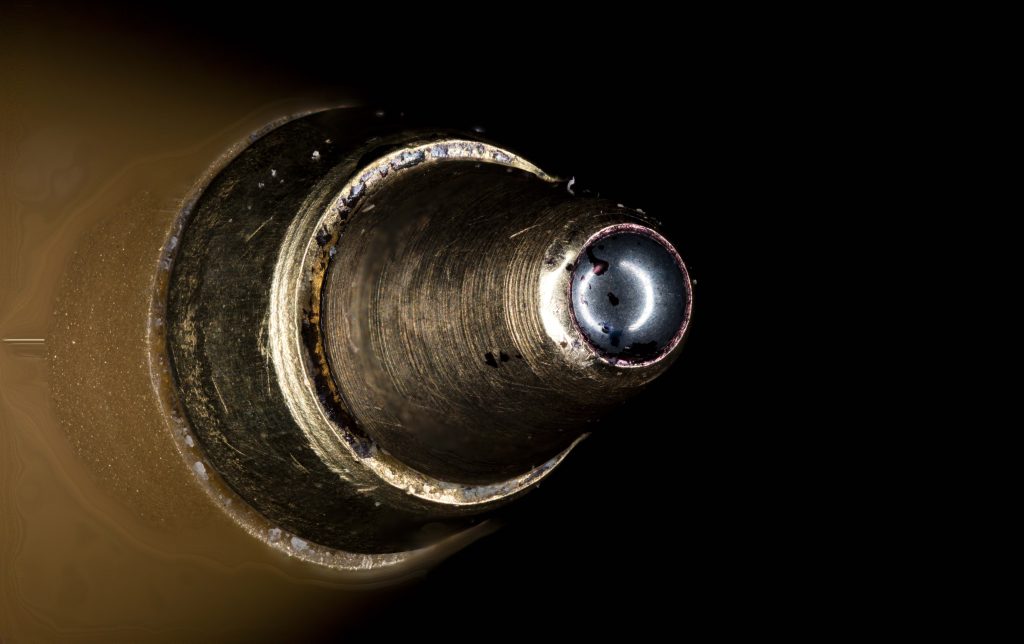
The detail is clear enough so that ink splatters can be seen on the ball itself, as well as the weld used to join the writing parts of the pen together. You can see how the photo is taken here.
The image is actually a series of shots, this is neccessary because when taking pictures of such small items the depth of field is extremely small. In fact at 5 times magnification using the Canon MPE 65mm macro lens the depth of field is a mere 0.269mm! so a shot like the one above is often made up of over 100 images. These are then stacked using a piece of software called Helicon Focus (which does have a free trial) Below is a video of a cocktail stick showing the assembly of the image:
You can see the software analysing each image in turn and adding it to a depth map to the right. Once this is completed then it adds all the images ontop of each other and the finished product is a complete stacked image of a tiny object!
Why not add your macro photos to our free photo hosting website ClickASnap?