In a recent post we explored what an F stop is and how you use it. In this post we are going to explore ISO and how it affects your photography.
Firstly, what does ISO stand for? Well it means ‘International Standards Organisation’, a bit of a strange thing to be found on a camera but there you go! But, just what is it and how do you use it? Well, most cameras have ISO settings of between 50 all the way up to 6,400 or so, some go way higher, others a lot lower. Our Canon 5DSR goes to 12,800 for example. The lower you set the number the lower the sensitivity and therefore the lower the ‘grain’ of the film. (The grain is the almost snowy/static effect you see on images taken at a high ISO or massively digitally zoomed in)
[showad block=2]
What does this mean for your photography and how do you use it though?
The 4 photos below were taken with the same shutter speed and F stop. The camera used was a Canon 5DSR coupled with a Canon 70-200mm F2.8 II USM L series lens
[Best_Wordpress_Gallery id=”7″ gal_title=”ISO”]
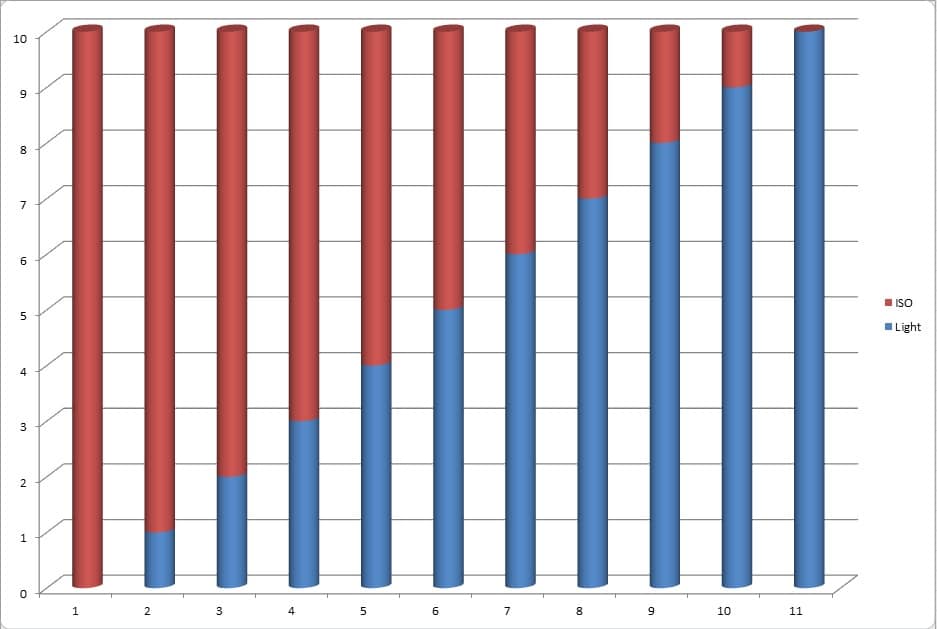
If you scroll from the ISO 500 through to the ISO 6,400 you will notice the images get lighter and lighter. This is because as the ISO number increases so does the sensitivity. This means that the sensor becomes more receptive to photons of light hitting it, which translates into a higher voltage output for that particular pixel, therefore a ‘lighter’ pixel is shown in the picture. (The 5DSR is an incredibly high resolution camera, equipped with a 51.8 megapixel sensor it still performs outstandingly at such high sensitivities.) Below is a simple chart showing you what the effects of changing the ISO are in relation to the pixel.

Looking at the chart above, imagine that each column is a hollow tube and that the light is actually a liquid. We take a picture, our aperture and our shutter speed remain exactly the same and the only thing we change is the ISO setting. We press the shutter button and the light (liquid) streams through the lens for a fixed period of time. As the ISO number is increased (moving from left to right on the chart) the amount of liquid that can be ‘accepted’ by each column during the exposure time increases.
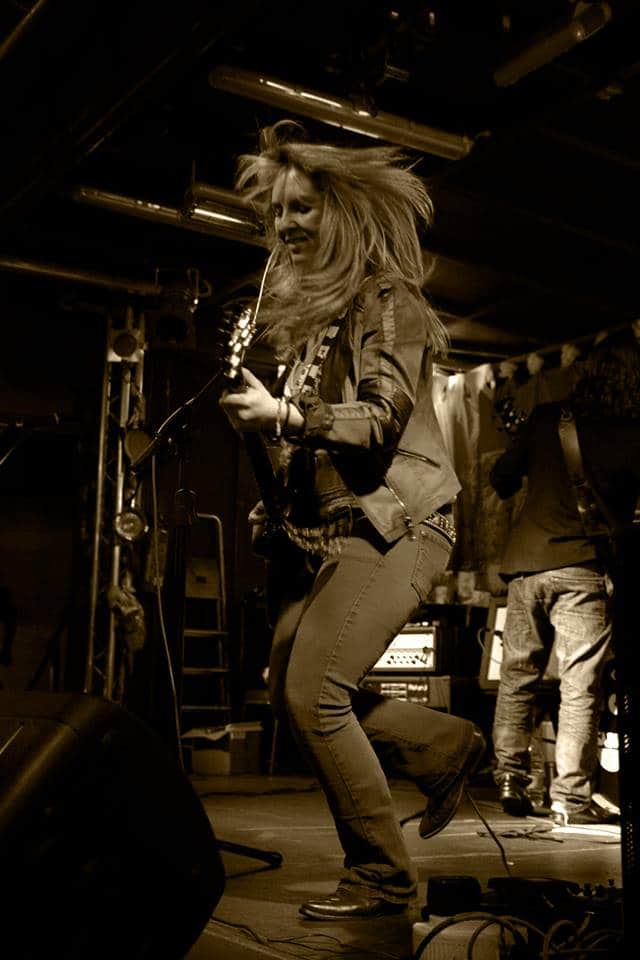
This is great, you can take pictures in low light conditions! Unfortunately with cheaper cameras you will notice the image gets worse and worse as the ISO number gets higher and higher. Ideally you don’t ever want to be taking pictures much above an ISO of 500, ideally around 250 or less. Unfortunately some situations require that you increase your ISO, for example music photography, or bands on stage. The image below was taken of Voodoo Vegas in Bournemouth:

This image had to be taken at a high ISO as the lens I was using was maxed out at F4.5 and I couldn’t use a slow shutter speed or I would have missed the movement of the guitarist. This meant the picture had to be processed and left in sepia and could never be made particularly large because of the grain of the photo (Note this photo was actually taken on a Nikon D7100 some time ago). The only alternative to this is to use a flash, but i personally try and avoid using a flash as much as possible in live situations as I can’t imagine a band would be very happy if a flash goes off right in their faces! Anyhow, when taking photos aim to keep the ISO as low as possible, if you have to raise it remember the higher it goes the lower the quality your photo will be!
[showad block=2]
If you’d like to know even more and you’re a bit more of a visual person here is a video from Mike Browne explaining in more detail
Do you have any tips and tricks using your camera? Comment below!
Would you like to write a post could be seen by 1.4 million users?